If you are installing a swing bearing on your excavator, you know you're in for a big job. If you're a smaller operation, replacing a swing bearing will likely take at least two days to get the job done right.
Installing a swing bearing on a large excavator can be a risky job as well if the proper safety precautions aren't taken. In any job, safety has to be the priority. Getting the job done quickly isn't worth losing life or limb.
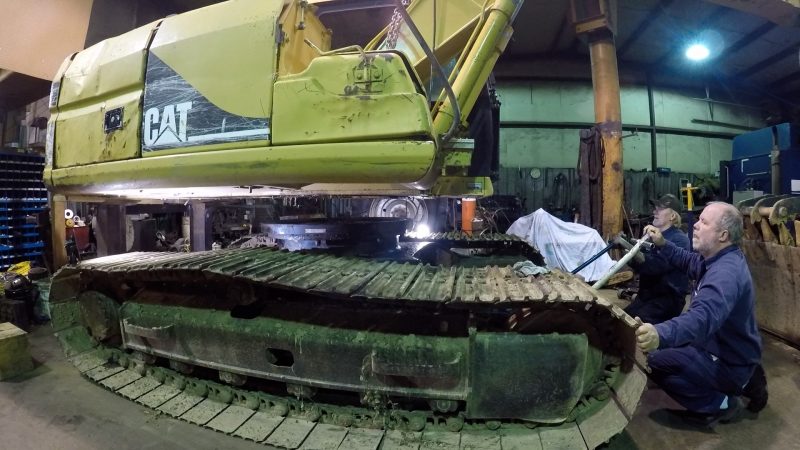
One of the safer ways to install a swing bearing is to separate the undercarriage from the upper structure by raising up the entire machine, disconnecting the rotary manifold and swing bearing, before dropping the undercarriage back down.
Cap off all the lines so you will be able to use the machine's hydraulics later in the process. It is good practice to mark the lines so there is no confusion later when reconnecting them.
You probably have seen an operation where the upper structure is lifted off the tracks. This method reduces stability. By instead dropping the undercarriage, there is more control over the machine.
Below is a video showing you this method.
Once you have the undercarriage separated from the cab and have fully secured the entire machine, you can start the process of removing the old swing bearing.
The first step is to loosen the bolts. Once you have all the bolts removed, you can take out the old swing bearing.
After removing the swing bearing, you will need to completely clean the turntable. Get all dirt, grease, and grime off the area and check the surface for any possible damage.
Carefully move the new swing bearing into place and line up the bolt holes. One of the most important steps happens way before you install the swing bearing. When you order your new part, be sure to make sure you have the right part number to correspond with your machine's serial number. There is nothing worse than getting the job started only to discover you got have the wrong bearing.
On the DYCO swing bearing there is an S stamped into the metal. This indicates where the heat treat process begins and ends. You will want that section of the swing bearing to be placed on the machine in the area that receives the least amount of punishment.
You should also clean the new bearing with brake cleaner and a rag to get the excess oil off.
When you have the swing bearing placed on the turntable you will want to silicone the surface to keep new dirt and grime from contaminating the area. Then line up the bolt holes. You will want to replace all the old bolts with new ones. Using the old bolts will compromise the performance of the new swing bearing.
It is then time to grease the swing bearing with a grease gun. You will know when the bearing is completely greased when grease begins to ooze back out.
Dropping the upper structure back down onto the undercarriage is the next step. This process is the most important and precarious of all the steps. You need to be careful as you lower the machine down. The difficult part is making sure the swing gear lines up correctly.
Usually, the gear will be off by a fraction so you will need to every so slightly manipulate the cab until it drops into place. This is why you cap off the lines. You will be able to use the machine's power to do this.
Once the upper structure is on the undercarriage, you will secure the two together again using new bolts to secure the swing bearing to the cab.
Torque all the bolts to spec, then, when you know it is all secure, you can drop the machine back down. Reinstall the rotary manifold with a new seal, reconnect the lines, and clean up the area.
Always check for leaks after the installation is complete.
Below is another video showing this entire process.
Need a swing bearing for your machine? Click below to get a quote today!